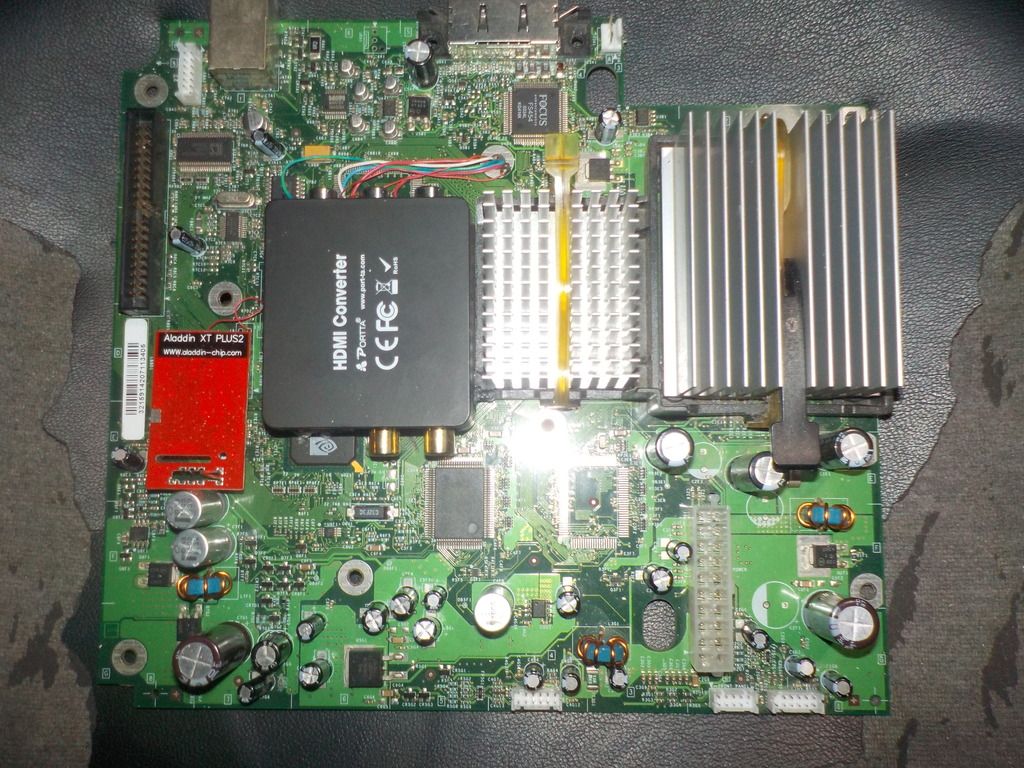
Here is my first prototype. It's been a while but life has been a bit busy lately. I have made the adapter common to the mother board rather than the Xbox case. I thought this to be a better solution because I can move the mother board around if need be rather than it requiring de-soldering should it need to move from a case. It also makes the mother board HDMI modded rather than the case. A big surprise that wasn't by design but has had a big effect is because the side of the heatsink is now boxed in, more air is being channeled through the heatsink and therefore cooling is much better by about 4c.
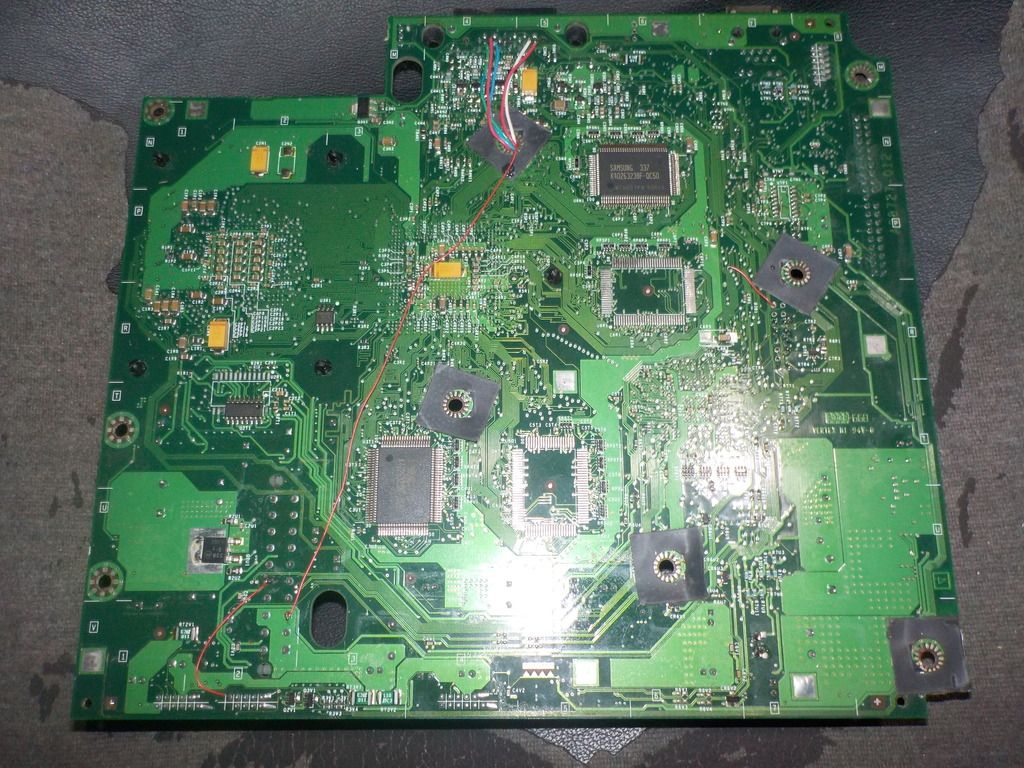
All the wires to the AVIP solder points all go down the unused mounting mother board hole, (that is unused after I cut the post off the case of the 1.0-1.5 cases). Look closely and you will see I used the earth ring around the mounting hole as the ground for the converter board. There is a red wire soldered to the ring itself. This ground doubles as the ground for not only the power but all the video and audio grounds as well. They are all common with this adapter and all Xboxes so that is why there are so few wires needed. I'm yet to look at a 1.6 mother board yet where this post isn't on the case nor is the hole in the mother board. A 1.6 mother board and case will require a different routing of the wires because this hole isn't in the mother board. I'll think of that when I HDMI mod my 1st 1.6 board I guess.
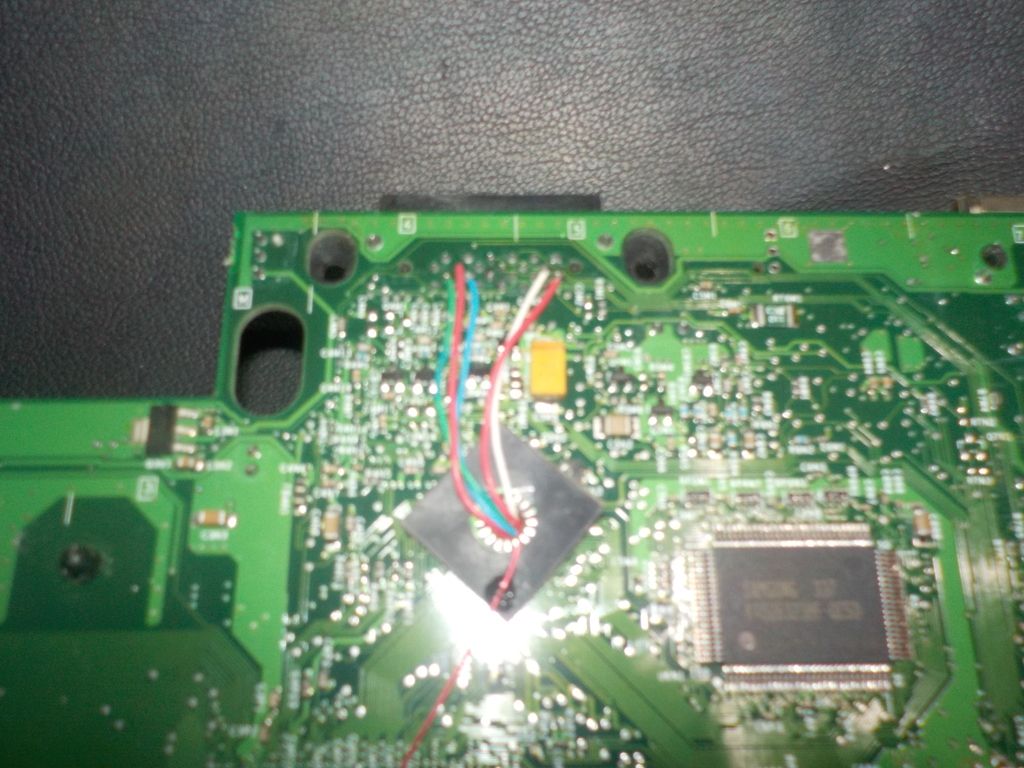
The wires go through the board using the hole and are soldered direct to the AVIP pins. Five wires in total so pretty easy stuff plus the links that enable component. These links go between pins 11 and 12. The other link goes between pins 13 and 14.
The red wire going down the board is for the 5vDC supply from the mother board power supply connector.
Don't worry about the other red wire near the power supply connector. It is for a completely different mod.
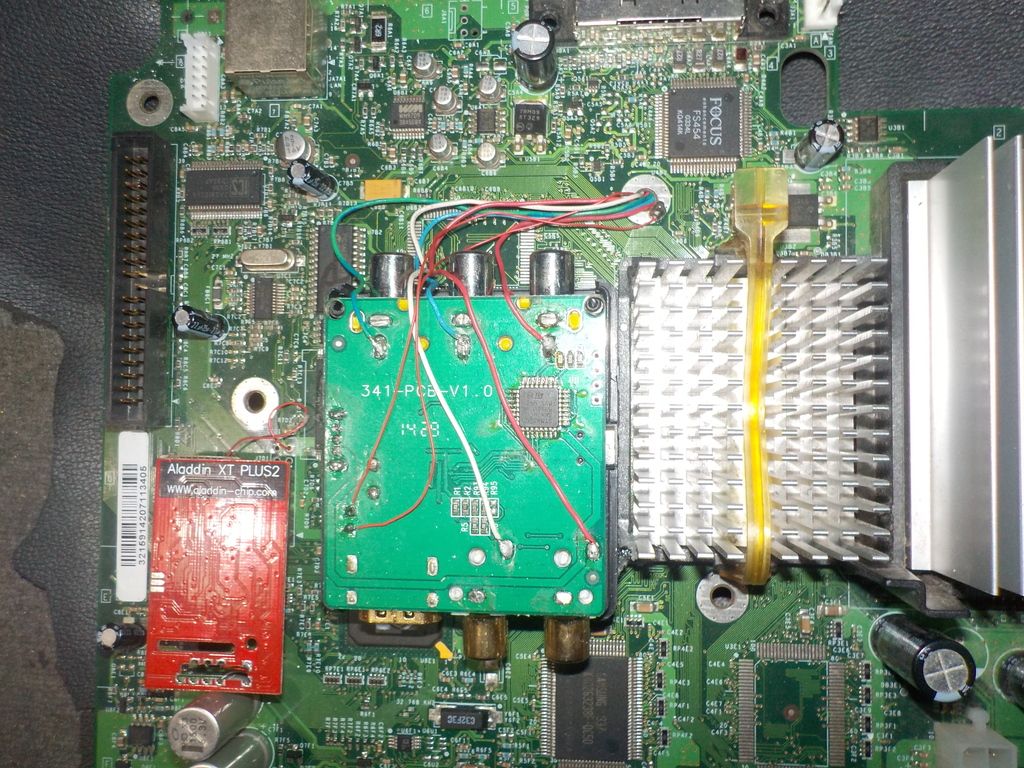
This picture shows the required soldering to the converter board itself. I tried to colour code all the wires but I still ended up with 3 red wires.

The green, blue and red wires at the top of the picture are the component wires leading to the component pins on the underside of the AVIP connector. The red and white wires at the bottom right of the board are the stereo sound wires that again, go to the AVIP connector solder pins. And the two red wires going to the bottom left of the board are the power wires. The upper red is the positive wire that goes to the mother board power connector and the lower red is the ground that goes to the mother board mounting ring and is ground for everything. These wires on the converter board are soldered to the capacitor that is across the power rail on the converter board. An ideal location for supplying power to the board.
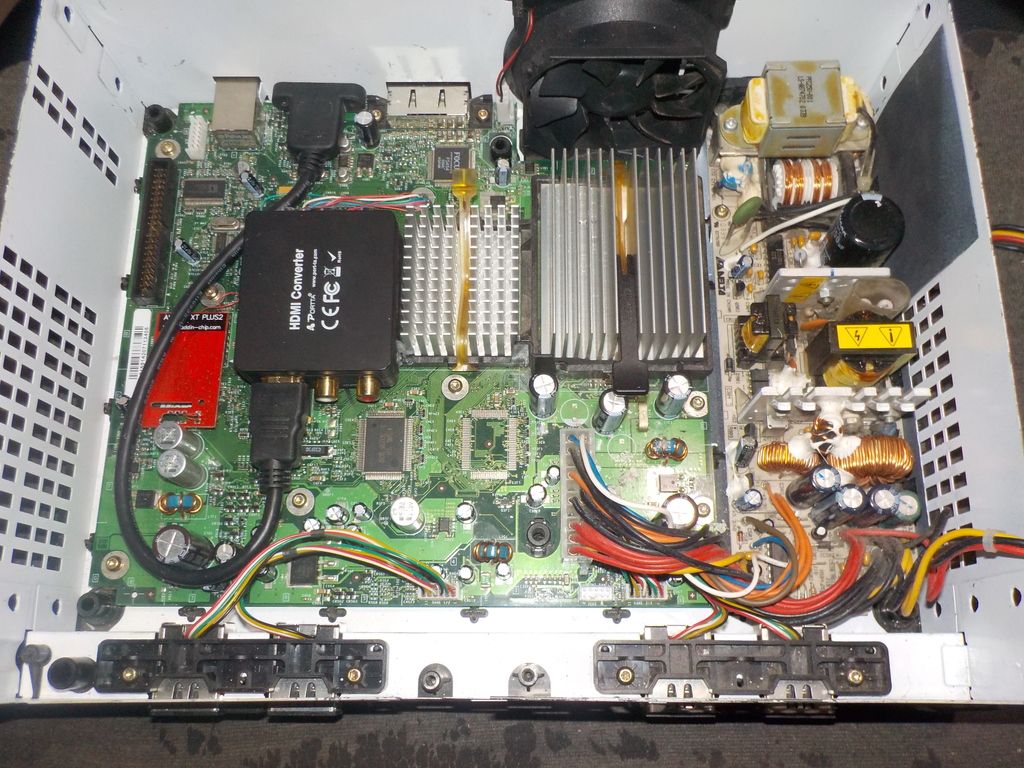
I put the converter case lid back on and plug in the HDMI case mount cable. Bolt the HDMI cable to the case, that has the HDMI plug and mounting holes already made for it earlier and the job is done. That HDMI bulkhead cable is 300mm long by the way. Only place I could find that had them that size and style was Canada and the post was poor, over 4 weeks.

This picture shows the bare DVD caddy so you can see the finished wire routing and also the fact the adapter is the same height as the adapter box and fits perfectly under the DVD caddy and the DVD drive itself. The DVD drive cables go straight in as does the flat cable to the DVD drive and the HDD. The mod wires don't effect these at all. Doing this mod this way enables me to unbolt the HDMI cable from the Xbox case and remove the mother board with the converter all as one piece ready to go into another case that has the HDMI mount holes in it. No soldering, just the two HDMI mount bolts. I now have another 3 machines to do this mod to but I will change a few things. I will use Velcro glued to the large chips beside the heatsink to mount the lower half of the converter case rather than gluing the case itself as I did with this one solely so I can easierly remove the converter case if required and I will use flat multi strand ribbon cable instead of single core solid wires just to make it look more factory. I can also say the picture is perfect with no frequency lines or any other kind of interference lines on the TV screen and best of all, no more dedicated Xbox cables and HDMI leads come in all different lengths. Well that is it. This is my "How To HDMI Your Xbox". I will add more pictures of the other machines when I do them.